

There is nothing quite like opening up a brand-new custom sign, lining it up against your glass and getting ready to transform your store or office front. Whether you are adding operating hours to a entrance or putting up decorative art on home glass, a smooth installation makes all the difference.
However, anyone who has tried installing large graphics knows the single most frustrating part of the process: trapped air bubbles. One wrong press, and suddenly your sleek glass display looks bumpy and uneven.
The good news is that getting a smooth finish does not require years of professional installation experience. All it takes is the right preparation, a little patience and a proven method. Here is a clear walkthrough on how to get flawless, bubble-free graphics on your glass every single time.
Popular Products







Why Do Air Bubbles Form in the First Place?
Before jumping into the installation process, it helps to know what actually causes those pesky pockets.
Air bubbles usually happen for three main reasons:
- Dust and Grit: Tiny specs of dirt trapped under vinyl lift the material off the glass, creating tiny air pockets that won’t flatten out.
- Speeding Through Application: Pressing large graphics onto glass too quickly captures air before it has a chance to escape out the sides.
- Dry Application on Large Graphics: Sticking heavy adhesive directly onto dry glass leaves zero room for repositioning or smoothing out vinyl creases.
By tackling these basic issues upfront, you will save yourself plenty of time and avoid wasting expensive custom materials.
Read Also: What Are Window Decals? Everything You Need to Know
Dry vs. Wet Application: Which Method Should You Use?

When deciding how to handle your graphics, you generally have two choices: applying them dry or using a liquid application spray.
- The Dry Method: Great for small lettering, small logos, or lightweight decals. You simply peel off the backing and press it onto clean glass. It is fast, but it leaves zero room for mistakes once the adhesive touches the surface.
- The Wet Method: The absolute best way to apply window decals when dealing with medium to large vinyl graphics. By spraying a mild soapy water mixture onto both the glass and the adhesive side, you temporarily neutralize the glue. This lets you slide the graphic around into perfect position and squeegee out every drop of water and trapped air effortlessly.
Unless your graphic is smaller than a standard postcard, the wet method is almost always the safest path to a flat finish.
Tools You Will Need Before Starting
Having your supplies laid out on a nearby table keeps the process stress-free:
- Squeegee or Plastic Card: A felt-edged squeegee is ideal, but a standard plastic credit card wrapped in a soft microfiber cloth works just fine.
- Spray Bottle Solution: Mix a few drops of mild dish soap into clean water. Avoid heavy soaps with skin moisturizers or scents, as they can weaken adhesive bonds.
- Microfiber Cloths & Paper Towels: For wiping away excess water along the edges.
- Isopropyl Alcohol: To strip away grease, wax, and fingerprint oils from glass.
- Painter’s Tape: Crucial for measuring and locking down your graphic’s position before peeling off the backing.
Step-by-Step Guide to Applying Window Decals

Follow this sequence to ensure your installation goes smoothly from start to finish.
Step 1: Clean the Glass Thoroughly
Never skip deep cleaning. Even glass that looks spotless can hold invisible oil films, dust, and microscopic road grime. Wash the pane thoroughly using isopropyl alcohol or a ammonia-free glass cleaner, then wipe it completely dry using a lint-free microfiber cloth.
Step 2: Measure and Lock Down Your Position
Proper window decal placement sets the foundation for a professional look. Hold your graphic up against the glass, use a tape measure to check spacing from the window frame, and secure the top edge using a strip of painter’s tape. This creates a reliable hinge so your sign won’t shift sideways midway through installation.
Step 3: Wet the Surface and Vinyl
Flip the graphic upward using your tape hinge, then peel off the paper backing to expose the sticky side. Spray your soapy water solution generously over both the exposed adhesive and the glass surface. Don’t worry about using too much liquid more moisture makes decal application on glass significantly easier.
Step 4: Lay the Graphic Down and Squeegee
Lower the wet graphic back down onto the wet glass. Thanks to the soap layer, you can slide the vinyl around until it aligns perfectly. Starting from the center of the design, push your squeegee firmly outward toward the edges in smooth, overlapping strokes. This pushes out the water layer along with any trapped air pockets, giving you a smooth, bubble-free window decal application every single time.
Step 5: Wipe Dry and Let It Set
Use paper towels to catch the water running down the glass. If your graphic includes a top layer of transfer tape, let the design sit for 10 to 15 minutes so the adhesive can grip the glass before carefully peeling away the tape at a sharp 180-degree angle.
Key Mistakes to Avoid During Installation
Even experienced installer crews run into trouble if they rush the job. Here are the most common window decal application mistakes to avoid:
- Installing in Direct Hot Sunlight: Applying vinyl on baking hot glass causes soapy spray to evaporate instantly. This makes adhesive stick prematurely, creating wrinkles and trapped bubbles. Work in the shade or during cooler times of day.
- Using Household Glass Cleaners with Ammonia: Ammonia leaves behind a thin chemical haze that breaks down vinyl adhesives over time, causing edges to curl within a few weeks.
- Pushing Too Hard with Bare Hard Plastic: Rubbing a raw credit card directly across delicate vinyl can scratch your graphics. Always wrap hard plastic edges in a soft cloth.
Choosing the Right Decal Material for Your Space
Different glass areas require different material styles. Knowing your options makes choosing and applying your graphics far easier:
| Material Style | Best Applications and Features |
| 1. Opaque Vinyl | High contrast, blocks light, bold |
| 2. Perforated Vinyl | One-way vision, ideal for store |
| 3. Die-Cut Shapes | Custom contoured shapes, sharp look |
| 4. Static Clings | Temporary, zero adhesive, reusable |
- Full Coverage Graphics: When you want bold colors that completely block street views, heavy-duty opaque window decals offer vibrant color contrast and privacy.
- One-Way Storefront Display: For shop fronts where you want graphic messaging on the outside without blocking daylight inside, perforated window decals feature tiny micro-holes that let light stream straight through.
- Custom Cut Outlines: If your logo features intricate lettering or distinct shapes, die-cut window decals remove excess border material, leaving clean graphic contours directly on your glass.
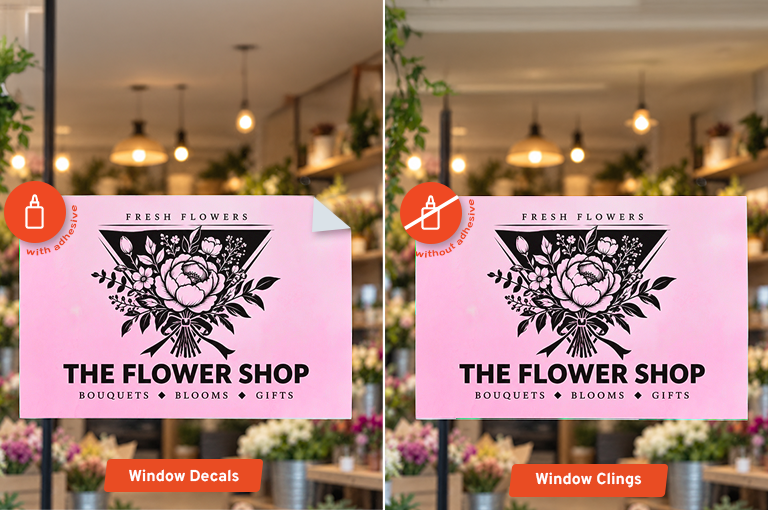
- Short-Term Displays: If you only need temporary promotional graphics for seasonal sales, window clings rely on static electricity instead of glue. They pull away cleanly in seconds without leaving sticky residue behind.
- Safety & Decorative Touches: Etched patterns on a frosted window create elegant visual privacy for office meeting rooms. On exterior home panes, subtle window decals for birds feature UV-reflecting patterns that prevent wild birds from accidentally flying into clear glass reflections.
Whether you need permanent exterior window signs or temporary removable window decals for quick marketing campaigns, using proper wet application methods ensures your brand assets look clean, sharp, and inviting.
Final Thoughts
A bubble-free installation starts long before the decal touches the glass. Clean the surface, measure carefully and choose the application method based on the size of your graphic. For small designs, dry application can be quick and simple. For larger graphics, wet application gives you more control and makes it easier to work air and water out toward the edges.
Take your time, avoid the common installation mistakes and inspect the decal before walking away from the finished job. Whether you are installing window decals, promotional window signs, perforated window decals or decorative graphics, a careful application can make the finished display look considerably more professional.
Read More: Window Decals vs. Window Clings: What’s the Difference?
Frequently Asked Questions
Q1. Can I apply a window decal without a squeegee?
Ans. Yes, especially for a small decal. A plastic card wrapped in a soft microfiber cloth can work as a substitute. For large graphics, however, a proper squeegee makes it much easier to push out air and water evenly.
Q2. Should I apply window decals wet or dry?
Ans. It depends on the size and design. Small decals and lettering can often be installed dry. For medium to large graphics, wet application gives you more room to reposition the decal and remove trapped air.
Q3. How do I remove bubbles from a window decal?
Ans. For a small bubble, gently work the air toward the nearest edge with a squeegee. If it remains trapped, a tiny pinhole may allow the air to escape. Large or widespread bubbles may require part of the decal to be removed and reapplied.
Q4. Can removable window decals be reused?
Ans. It depends on the specific material. Some removable window decals are designed for easier removal, but not every removable adhesive graphic is intended to be reapplied. Check the product specifications before assuming it can be reused.
Q5. How long should I wait before removing transfer tape?
Ans. For a wet installation, allowing the graphic to settle for around 10 to 15 minutes can help, but the appropriate waiting time varies by product and installation conditions.